
Monday, May 31, 2010
Saturday, May 29, 2010
Introducing Ann Healy as our Guest Designer This Week
Our guest designer this week is the very talented Ann Healy!
She has made an absolutely fabulous Parisian layout for us this week:
 The way she has altered the Prima flower from the kit is bordering on genius! So effective and pretty!
 Ann has combined and layered lots of elements from this month's kit and really embraced the vintage theme!
 You can find Ann over on the Crafty Alley Ning Network , so if you haven't already signed up, what are you waiting for? There are lots of super talented ladies sharing their work over there.
Friday, May 28, 2010
This has been a great kit!


Thursday, May 27, 2010
May Vintage Findings Kit
Hi there and thanks for stopping by. Today I'd like to show you some cards that I've made using the gorgeous DP from the May Vintage Findings Kit.


Supplies used:-
Bazzil cardstock
Bazzil Bling Cardstock
Vintage Findings patterned paper
Distress Stickles
Hope you like the cards that I've created and has given you a little inspiration.
Enjoy the rest of your week.
Hugs Michele x
Wednesday, May 26, 2010
Tutorial Wednesdays: How To Make a Star Book
Hi Guys!
Here is the star book tutorial as promised.
Also, I have added some more photos from Ebony to the Monday post, so scroll down and have a look!!
Hugs
Katie xoxo
Monday, May 24, 2010
Vintage Star Book
Today I have a star book to share with you all. Here it is closed ..

 I made a charm using the Magic Mesh supplied in the kit, and one of the butterflies from the butterfly ribbon, which I coloured with inks and adhered to one of the Tim Holtz fragment charms. I also added the key from the kit and tied some of the red ribbon to the swivel clasp.
 Here is the book opened out:

 I will be posting a tutorial on this project TOMORROW so stay tuned!!
Sunday, May 23, 2010
Introducing This Weeks Guest Designer: Ebony!!
How are you all? I hope you have all had a fantastic weekend and enjoyed the beautiful weather!
We have a great start to the week this week, and it is my great pleasure to introduce to you our Guest Designer for this week: Ebony!

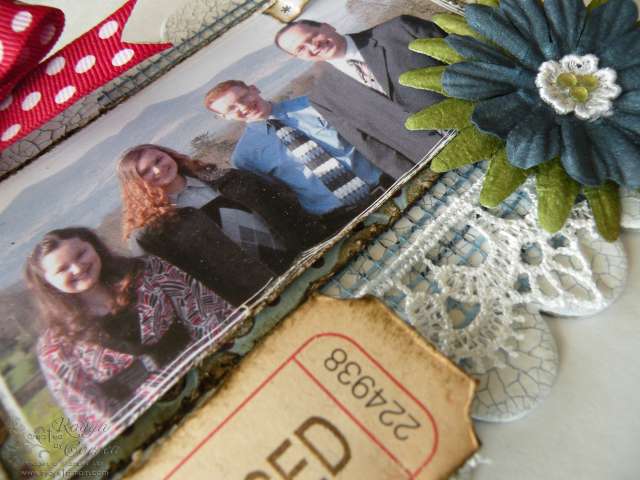
 Ebony has also made a beautiful chipboard mini page for us using the May kit:
 I love how Ebony has combined her artistic style with a vintage photograph to create a piece that is as unique as it is beautiful..
 Here's a few words from Ebony on her project:
Friday, May 21, 2010
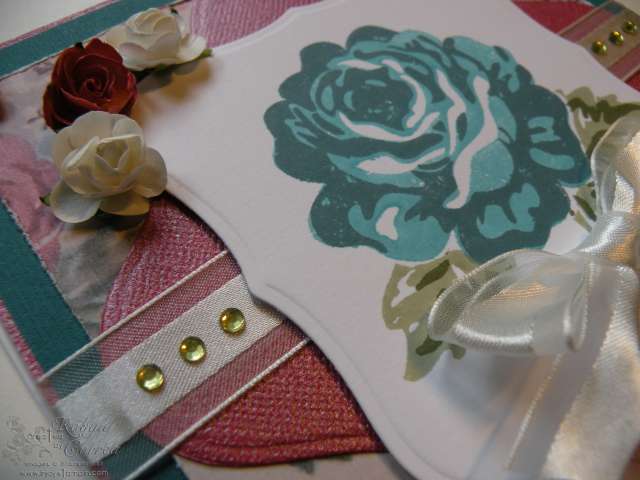
A Rose is a Rose

Thursday, May 20, 2010
Chipboard Clipboard Tutorial
 Hi there and thanks for stopping by. Today I'd like to show you how I've made this cute little clipboard using items from the May Vintage Findings Kit.
1 x DP 12.5cm x 9.5cm
1 x DP 12cm x 9cm
1 x DP 8.5cm x 7cm
1 x DP 8cm x 6.5cm
Distress Ink

First of all ink all the edges of the Scalloped Chipboard piece using distress ink. For my project I've used Frayed Burlap.

Next ink all the edges of the DP again using Distress Inks. For the next step I've added Distress Stickles to the edges of the Scalloped Chipboard piece along with the DP.

Next I've used MME Bloom & Grow clear stamps set from Crafty Alley and stamped the images using Frayed Burlap Distress Inks. I've then applied double-sided tape to the underneath and stuck the papers down in the above layout.
And here is the end result after applying a cute little image and some flowers along with the Tim Holtz Idea-ology Hinge Clips and Swivel Clasps
I hope that this tutorial has given you some ideas.
Hugs Michele x
Tuesday, May 18, 2010
Monday, May 17, 2010
Introducing Timi as our guest designer this week.
This week I am delighted to introduce our guest designer Timi. Timi made this gorgeous exploding box using this months Crafty Alley May Kit (which has already sold out). If you have missed this months kit you can still register for next months kit. Please just email the shop and we will include you in our monthly kit club.


This exploding box is amazing and incorporates journalling, pockets and tags. You can read more about the project here on Timi's blog.
Thank you so much Timi for submitting your May kit project and being our guest designer this week Timi!
Remember you too can be a guest designer this month. Just email me pictures of a project you have completed using this months May kit.
Thanks all
Cathy x
Friday, May 14, 2010
Crafty Home Decor Made with Love


Thursday, May 13, 2010
Scalloped Chipboard Clipboard
Hi there everyone and thanks for stopping by. Today I'd like to show you a little project that I've made using items from the gorgeous May Vintage Findings Kit.

Everything apart from the flowers and image I've used which is in the May Vintage Findings Kit. I'll put together a tutorial on how to make this cute little clipboard and post it on here in the next few days - so watch this space :0)
Enjoy the rest of your day.
Hugs Michele xx
Wednesday, May 12, 2010
Tutorial Wednesday: How to make a Carnation Flower
Katie here, and I have a quick tutorial to share with you today.
I don't know about you all, but I am slightly obsessed with flowers. I grow them, I buy them, I draw them, I paint them, I decorate with them, I make them, I even eat them (edible ones, in a salad of course).
One of my favourites (not to eat!! ha ha) is this type of carnation, so I decided to work on a method to make a flat(ish) version out of paper that I could use on cards and other papercrafting projects. And, the best part of this tutorial is that it uses SUPER cheap materials.
 I'm not at home at the moment, I had to go unexpectedly to the UK so don't have access to all my usual equipment, so big thanks to Jo Brett for allowing me to use all your things! She has the pink Cuttlebug, isn't it cute??
For this tutorial you will need:

- plain old white computer printer paper
- any type of edging scissors
- glue
- watercolour paints
- a die-cutting machine and die, or flower punches. Whichever you use, you will need to be able to cut three different sizes of flower. I am using the Hello Kitty nested flowers Sizzlet.
Firstly, you will need to cut your paper pieces. Die-cut or punch 7 large flowers, 3 medium flowers, and 3 small flowers.
 Then, use your scissors to trim off the very ends of your petals to give a frilly look.
 With your 7 larger flowers, gradually cut off more and more of the petal to make the petal layers gradually reduce in size.
 Now, using whatever colour you like, paint the edges with watercolour paints. You could also use inks, or pens, or whatever you have. I just love watercolours :)
 You should now have something like this. On the smallest flowers, I also painted some yellow and green into the centres.
 When they are dry, it's time to add some body to the petals. For this, I have used a hair grip! But you could use whatever you like. I thread each petal into the grip, and twist.
 This makes each layer look a bit like this:
 When they are all completed, you should have something like this:
 Now, layer up your pieces and glue into place, and you're done!!

Tuesday, May 11, 2010
Fun Squash Book


