Wednesday, June 2, 2010

Tutorial Wednesday - Handmade Paper Flowers with Stamen Centres

dscf7781

Hi there and thanks for stopping by. Today I've a tutorial to show you on how to make the above flowers along with the handmade stamen centres.

clip_image002

Here is a list of supplies to make the above flowers:-

4 x 5 petal flower shapes

Piece of string

Crushed Velvet Flocking (or anything similar)

Embossing Tool

Clothes peg

Marker pen

Piercing tool

Scissors

Tweezers

PVA glue

clip_image005

On each flower, cut down the petals to open them up more. In the picture I've tried to show you roughly where to cut.

clip_image007

Turn the flowers onto the wrong side. On each petal, emboss just the outside petals in small circular motions. Then with the embossing tool again, gently go down each petal to create a line.

clip_image009

Now turn the flowers onto the right sides and emboss the centre of each flower until they resemble the flowers on the left hand side.

clip_image011

In the centre of each flower, pop a small blob of pva glue and start layering them up. On the last flower also pop a small amount of glue. At this point get your piercing tool to make a hole all the way through. Make sure it's quite a large hole as the string has to go though this.

clip_image013

Now get your piece of string and this is where the marker pen comes in. Colour the string whatever colour you want just by dabbing the pen onto the string. This way it won't ruin the nib of your pen. Wait a few minutes for the ink to dry and then start twisting the string until it starts to unravel. Separate the string until it resembles the above picture.

clip_image015

Now attach the string to the clothes peg and carefully dip the ends into some glue. Make sure you get a nice bit on the ends.

clip_image017

Next step is to sprinkle the flocking, glitter, flower soft etc.... onto each section. Make sure that it is fully coated. Then carefully feed the string through the top hole of the flower all the way through to the last flower layer. I find this is where the clothes peg comes in handy again as this will keep the string in place as it dries.

clip_image019

And here's a close up of what the flower will look like

I hope that this tutorial has given you some ideas on how to make paper flowers.

Hugs Michele x

Saturday, May 29, 2010

Introducing Ann Healy as our Guest Designer This Week

Hello everyone,

Our guest designer this week is the very talented Ann Healy!

She has made an absolutely fabulous Parisian layout for us this week:

The way she has altered the Prima flower from the kit is bordering on genius! So effective and pretty!

Ann has combined and layered lots of elements from this month's kit and really embraced the vintage theme!

You can find Ann over on the Crafty Alley Ning Network , so if you haven't already signed up, what are you waiting for? There are lots of super talented ladies sharing their work over there.
She also has a new blog HERE, so check that out too.

Katie xoxo

Friday, May 28, 2010

This has been a great kit!


Hi Ladies, I can hardly believe that it's time to close out another kit month! Where has the time gone?! Have you enjoyed seeing all of the DT projects as much as I have? So many great ideas to inspire.

Thank you Cathy for creating such a great kit for all of us to work/play with. Can't wait for the June kit, I'm sure everyone will just LOVE it!

The supplies used from the Crafty Alley May kit were:

Bazzil cardstock
Vintage Findings patterned paper
Vintage Findings Ephemera die cuts
Vintage Findings paper ribbon
Cotton ribbon trim (1 was Glimmer Misted)
Card base and envelope


Thursday, May 27, 2010

May Vintage Findings Kit

Hi there and thanks for stopping by. Today I'd like to show you some cards that I've made using the gorgeous DP from the May Vintage Findings Kit.

DSCF8654

DSCF8789

DSCF8794

Supplies used:-

Bazzil cardstock

Bazzil Bling Cardstock

Vintage Findings patterned paper

Distress Stickles

Hope you like the cards that I've created and has given you a little inspiration.

Enjoy the rest of your week.

Hugs Michele x

Wednesday, May 26, 2010

Tutorial Wednesdays: How To Make a Star Book

Hi Guys!

Here is the star book tutorial as promised.

Also, I have added some more photos from Ebony to the Monday post, so scroll down and have a look!!

Hugs

Katie xoxo

Monday, May 24, 2010

Vintage Star Book

Hello everyone,

Today I have a star book to share with you all. Here it is closed ..


I made a charm using the Magic Mesh supplied in the kit, and one of the butterflies from the butterfly ribbon, which I coloured with inks and adhered to one of the Tim Holtz fragment charms. I also added the key from the kit and tied some of the red ribbon to the swivel clasp.

Here is the book opened out:


I will be posting a tutorial on this project TOMORROW so stay tuned!!

Hugs
Katie xx

Sunday, May 23, 2010

Introducing This Weeks Guest Designer: Ebony!!

Hello everyone!!

How are you all? I hope you have all had a fantastic weekend and enjoyed the beautiful weather!
We have a great start to the week this week, and it is my great pleasure to introduce to you our Guest Designer for this week: Ebony!
Ebony has made a couple of projects for us this week; firstly, an altered art journal:

Ebony has also made a beautiful chipboard mini page for us using the May kit:

I love how Ebony has combined her artistic style with a vintage photograph to create a piece that is as unique as it is beautiful..

Here's a few words from Ebony on her project:

"Hey guys, Design Kits are exciting! :) This was my first kit and it really was a great selection of crafty bits, very inspiring! I used the scalloped chipboard piece because it was just asking to be decorated! I used the red felt sheet (which got glammed up with Stickles), black lace and a Dabber (which wasn't in the kit) and made my first side. For the other side, I used a tattered rose Distress Ink to make it a bit colourful and then used one of the Vintage Findings papers to give it an old feel :) I found a picture of my boyfriends grandmother which was just perfect for my page and I embellished with the flowers. For the first side I used the swivel clip,key,hinge clip and pin to create a diverse look and I really loved the finished piece and I hope you do too! :) Thanks xx"

You can see more of Ebony's work on her blog HERE. Why not pop over and give her some crafty love?

Don't forget we are always looking for Guest Designers to be featured on Mondays, so please continue to email Cathy your beautiful creations.

Katie xoxo

Friday, May 21, 2010

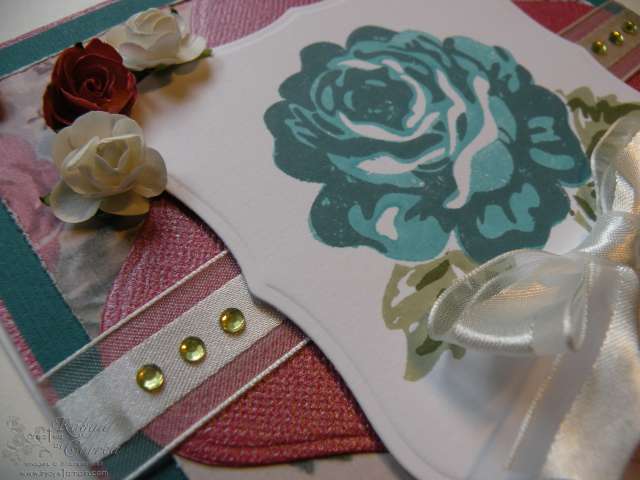
A Rose is a Rose


Hi Everyone,
Thanks so much for stopping by today. Here is a card made using the May kit from Crafty Alley. Hope you like it.

Supplies from the kit used were:

Bazzil cardstock
Bazzil Bling Cardstock
Vintage Findings patterned paper
Gems

Hope you have a great week!

Crafty Hugs,
Robyn xx


Thursday, May 20, 2010

Chipboard Clipboard Tutorial

Hi there and thanks for stopping by. Today I'd like to show you how I've made this cute little clipboard using items from the May Vintage Findings Kit.

1 x Scalloped Chipboard piece

1 x DP 12.5cm x 9.5cm

1 x DP 12cm x 9cm

1 x DP 8.5cm x 7cm

1 x DP 8cm x 6.5cm

Distress Stickles

Distress Ink

Gems

First of all ink all the edges of the Scalloped Chipboard piece using distress ink. For my project I've used Frayed Burlap.

Next ink all the edges of the DP again using Distress Inks. For the next step I've added Distress Stickles to the edges of the Scalloped Chipboard piece along with the DP.

Next I've used MME Bloom & Grow clear stamps set from Crafty Alley and stamped the images using Frayed Burlap Distress Inks. I've then applied double-sided tape to the underneath and stuck the papers down in the above layout.

And here is the end result after applying a cute little image and some flowers along with the Tim Holtz Idea-ology Hinge Clips and Swivel Clasps

I hope that this tutorial has given you some ideas.

Hugs Michele x