Showing posts with label Tutorial. Show all posts

Wednesday, June 2, 2010

Tutorial Wednesday - Handmade Paper Flowers with Stamen Centres

dscf7781

Hi there and thanks for stopping by. Today I've a tutorial to show you on how to make the above flowers along with the handmade stamen centres.

clip_image002

Here is a list of supplies to make the above flowers:-

4 x 5 petal flower shapes

Piece of string

Crushed Velvet Flocking (or anything similar)

Embossing Tool

Clothes peg

Marker pen

Piercing tool

Scissors

Tweezers

PVA glue

clip_image005

On each flower, cut down the petals to open them up more. In the picture I've tried to show you roughly where to cut.

clip_image007

Turn the flowers onto the wrong side. On each petal, emboss just the outside petals in small circular motions. Then with the embossing tool again, gently go down each petal to create a line.

clip_image009

Now turn the flowers onto the right sides and emboss the centre of each flower until they resemble the flowers on the left hand side.

clip_image011

In the centre of each flower, pop a small blob of pva glue and start layering them up. On the last flower also pop a small amount of glue. At this point get your piercing tool to make a hole all the way through. Make sure it's quite a large hole as the string has to go though this.

clip_image013

Now get your piece of string and this is where the marker pen comes in. Colour the string whatever colour you want just by dabbing the pen onto the string. This way it won't ruin the nib of your pen. Wait a few minutes for the ink to dry and then start twisting the string until it starts to unravel. Separate the string until it resembles the above picture.

clip_image015

Now attach the string to the clothes peg and carefully dip the ends into some glue. Make sure you get a nice bit on the ends.

clip_image017

Next step is to sprinkle the flocking, glitter, flower soft etc.... onto each section. Make sure that it is fully coated. Then carefully feed the string through the top hole of the flower all the way through to the last flower layer. I find this is where the clothes peg comes in handy again as this will keep the string in place as it dries.

clip_image019

And here's a close up of what the flower will look like

I hope that this tutorial has given you some ideas on how to make paper flowers.

Hugs Michele x

Thursday, May 20, 2010

Chipboard Clipboard Tutorial

Hi there and thanks for stopping by. Today I'd like to show you how I've made this cute little clipboard using items from the May Vintage Findings Kit.

1 x Scalloped Chipboard piece

1 x DP 12.5cm x 9.5cm

1 x DP 12cm x 9cm

1 x DP 8.5cm x 7cm

1 x DP 8cm x 6.5cm

Distress Stickles

Distress Ink

Gems

First of all ink all the edges of the Scalloped Chipboard piece using distress ink. For my project I've used Frayed Burlap.

Next ink all the edges of the DP again using Distress Inks. For the next step I've added Distress Stickles to the edges of the Scalloped Chipboard piece along with the DP.

Next I've used MME Bloom & Grow clear stamps set from Crafty Alley and stamped the images using Frayed Burlap Distress Inks. I've then applied double-sided tape to the underneath and stuck the papers down in the above layout.

And here is the end result after applying a cute little image and some flowers along with the Tim Holtz Idea-ology Hinge Clips and Swivel Clasps

I hope that this tutorial has given you some ideas.

Hugs Michele x

Thursday, April 22, 2010

Recipe Box Tutorial by Michele Roos

Hi there and thanks for stopping by. Today it's my turn to do a post and I thought that I'd show you a tutorial on how to make this cute little Recipe Box using the gorgeous goodies in the April Kit.


First, you will need a piece of cardstock that is 6 3/4" x 10 3/8" (this will be the bottom). and a piece that measures 7 3/8" x 11" (this will be the top)

Score the 6 3/4" x 10 3/8" piece at 2 1/2" on all four sides.

Score the 7 3/8" x 11" piece at 2 3/4" on all four sides.

Crease all score lines using a bone folder (on both the top and bottom pieces).

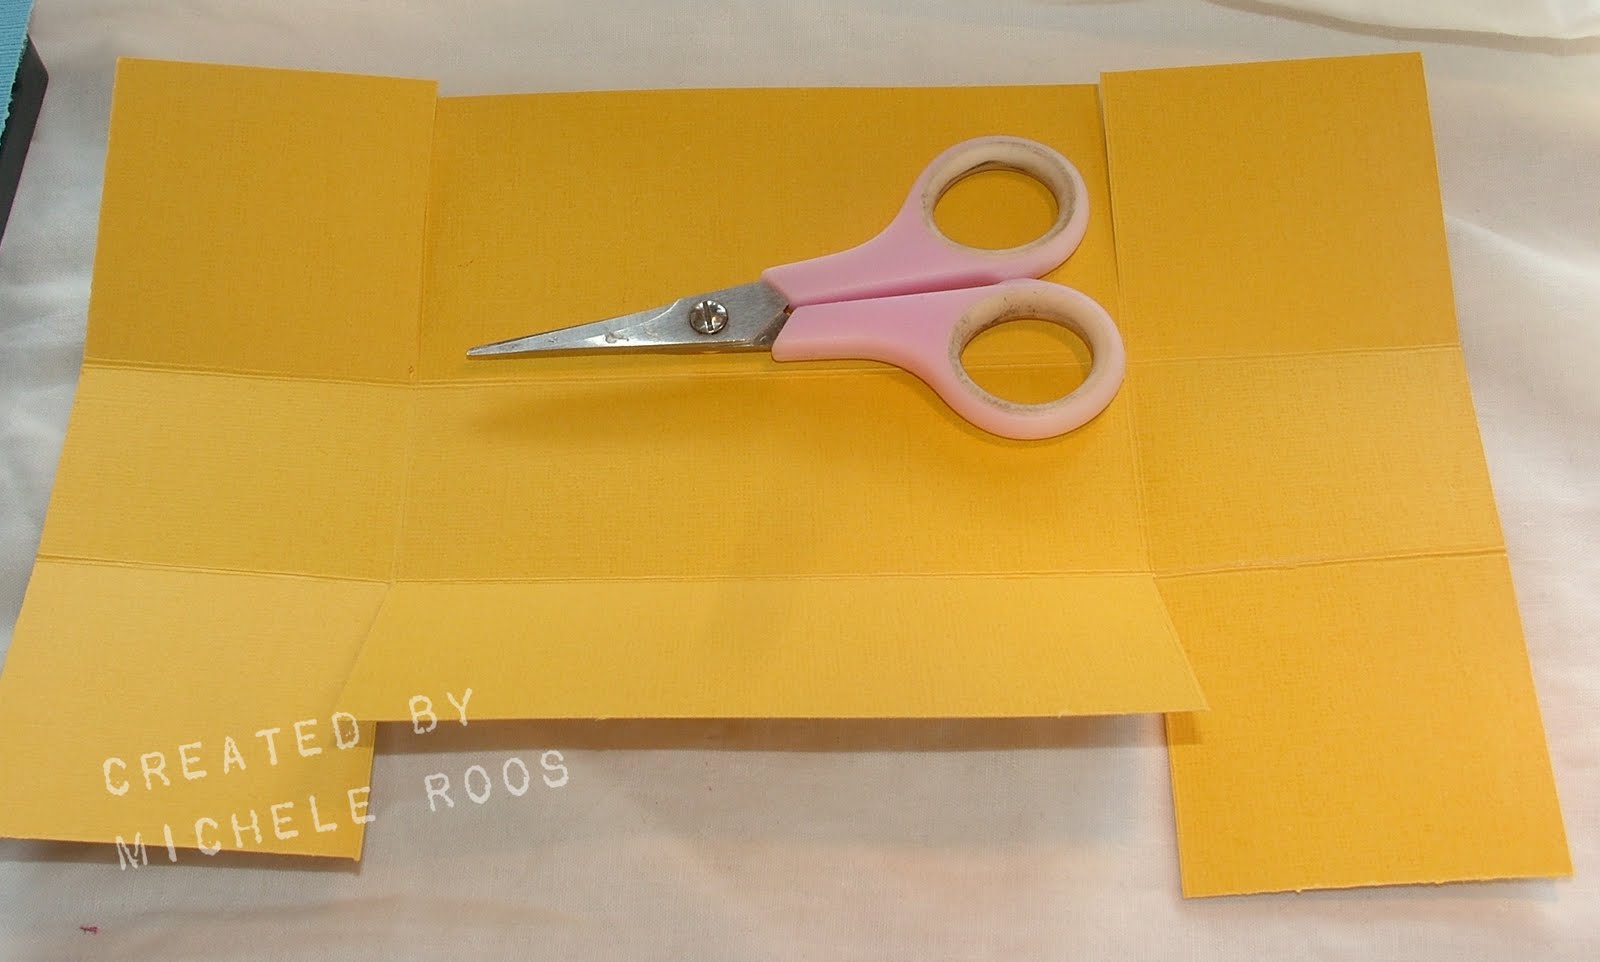
Make vertical cuts (following the score lines) to create "flaps" in each corner on both the bottom and top pieces of the cardstock


DSCF8300

**Optional** - I like to cut off part of the flaps (see picture above). I find that it makes for a nicer finished product, but this step is completely up to you.

DSCF8302

**Optional** - To pretty up the box a little bit I've used some of the gorgeous DP from the April Kit and then stuck it down using double sided tape.

DSCF8304

Using a strong doubled sided adhesive, assemble both the bottom and top pieces.

For the dividers, that go inside the box, I made mine 5 1/4" x 3 1/4". I also glued the circle tabs (see pictures below) so that they stick up above the top of the divider. This is important because I have created the top of the box longer...to accommodate those tabs. If you would put the tabs flush with the top of the dividers, the top of the box would be too long.

Here are some additional pictures of the box and the dividers I created...

DSCF8312

DSCF8316

DSCF8314

DSCF8315

All the material, apart from the divider tags, I've used to create this project is from the April Kit.

I hope that you've enjoyed this tutorial and has given you a little inspiration on what you can create using the gorgeous goodies from the April Kit from the Crafty Alley.

Hugs Michele xxx

Friday, April 9, 2010

Stamping with Chalks (using April kit supplies)


Stamping with Chalks

Tutorial created using April Monthly kit supplies available here.

If you would like to download a pdf document of this tutorial, click here. (Download may begin automatically).

For today’s tutorial, I have a pretty basic technique – perhaps even to be called at the “Beginner level.” Maybe it will be a reminder to you to dust off your chalks, or if you are new to stamping, perhaps it will inspire you. So many times when we first begin down the road of paper crafting we find there is just SO much out there. Of course, we’d love to own it all, but our budgets may not allow for it.

I wanted to create this tutorial to share an idea that you can do using chalks and an embossing ink such as Ranger Distress Embossing ink, or VersaMark. Chalks are a lot more affordable than ink pads and you can usually purchase them in sets or color families giving you a lot of color choices with little investment.

So take out your favorite stamps, some embossing ink, and some chalks and lets get creating!

I happen to own a lot of chalks, as I enjoy creating with them, but for this tutorial, I’m going to use the set of chalks that came with my April kit from the Crafty Alley Kit Club.


Step #1
Ink up your stamp with your embossing ink.


Step #2
Stamp image on to your cardstock.


Step #3

Add chalk to your dauber, cotton ball, or finger tip.


Step #4

Pounce chalk over ink (you can vary the effect by apply several different colors of chalk).


Step #5

Use a brush to remove excess chalk using a light sweeping motion. Chalk will adhere well to the embossing ink, so your image will be fine.


Step #6

You can vary the stamps you use and combine different images. I am using small images to add to my journaling spot and will repeat the steps above using the other colors of chalk from the set.


(Sorry about the poor quality of lighting in my room for this tutorial, my lighting depends a lot upon the weather outside).


Step #7 - Decorate


The supplies used to decorate my tag are from the April kit. I used the ribbons and fibers at the top, and added one of the scissors buttons as a charm. I then added a charm that I made from glass beads. I attached them using the wire stems from the paper flowers in the kit. I had removed the blossoms for use in another project. I slipped the stems through the beads and used them like you would jewelry gauge wire by twisting them to form a loop at the top and bottom of each bead. I then added some recycled jump rings from some jewelry that I had taken apart.

The orange flower was created using the orange cardstock from the kit; which I die cut using a Tim Holtz Tattered Floral Alterations die. I added the lace trim and daisy trim from the kit along the bottom and added a half backed pearl to the flower center.


I truly hope that this tutorial has been helpful for you. This technique makes lovely cards, and accents to scrapbook pages, I just happened to be creating a journaling tag for a mini album that I’m creating for my little girl. If you have any questions, please only ask, I’m happy to be of help.

Hugs,
❀ Robyn xx