Showing posts with label kit. Show all posts

Monday, August 9, 2010

Nursery Door Hanger

Hi there and thanks for stopping by. Today it’s my turn to show you my project that I’ve made using materials from the August Kit from the Crafty Alley.

DSCF9344

I’ve made this hanger completely from scratch using just cereal boxes as a base, I’ve taken photos along the way of creating this project so I shall do a tutorial for you another day.

Materials used from the kit :- DP, brass button, key embellishment, butterfly and Dried Marigold Distress Crackle Paint.

Hope you like this little project and that it gives you some ideas for creations with your August kit.

Hugs Michele x

Thursday, May 20, 2010

Chipboard Clipboard Tutorial

Hi there and thanks for stopping by. Today I'd like to show you how I've made this cute little clipboard using items from the May Vintage Findings Kit.

1 x Scalloped Chipboard piece

1 x DP 12.5cm x 9.5cm

1 x DP 12cm x 9cm

1 x DP 8.5cm x 7cm

1 x DP 8cm x 6.5cm

Distress Stickles

Distress Ink

Gems

First of all ink all the edges of the Scalloped Chipboard piece using distress ink. For my project I've used Frayed Burlap.

Next ink all the edges of the DP again using Distress Inks. For the next step I've added Distress Stickles to the edges of the Scalloped Chipboard piece along with the DP.

Next I've used MME Bloom & Grow clear stamps set from Crafty Alley and stamped the images using Frayed Burlap Distress Inks. I've then applied double-sided tape to the underneath and stuck the papers down in the above layout.

And here is the end result after applying a cute little image and some flowers along with the Tim Holtz Idea-ology Hinge Clips and Swivel Clasps

I hope that this tutorial has given you some ideas.

Hugs Michele x

Thursday, May 13, 2010

Scalloped Chipboard Clipboard

Hi there everyone and thanks for stopping by. Today I'd like to show you a little project that I've made using items from the gorgeous May Vintage Findings Kit.

DSCF8429

Everything apart from the flowers and image I've used which is in the May Vintage Findings Kit. I'll put together a tutorial on how to make this cute little clipboard and post it on here in the next few days - so watch this space :0)

Enjoy the rest of your day.

Hugs Michele xx

Thursday, April 29, 2010

Material Girl Sewing Box

Hi there everyone and thanks for stopping by. Today I'd like to show you a project that I made using items from the April Kit (apart from the flowers and the cotton reels)

image

I have so many little reels of cotton that I decided to make this little box with four drawers that would hold them all in.

DSCF8348

For this drawer I used the scissor charm from the kit and glued it to the button which is also from the kit.

DSCF8342

DSCF8346

DSCF8345

For these drawers I've used the beads from the kit and I've attached them using buttons which are also included with wire and then glue.

I hope this has given you some ideas on how versatile this kit is.

Hugs Michele xxx

Thursday, April 22, 2010

Recipe Box Tutorial by Michele Roos

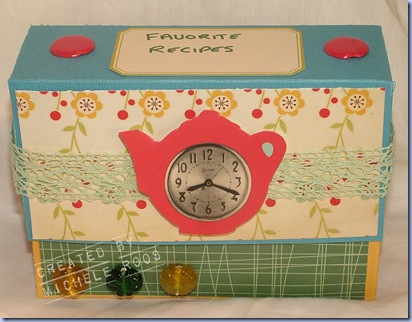
Hi there and thanks for stopping by. Today it's my turn to do a post and I thought that I'd show you a tutorial on how to make this cute little Recipe Box using the gorgeous goodies in the April Kit.


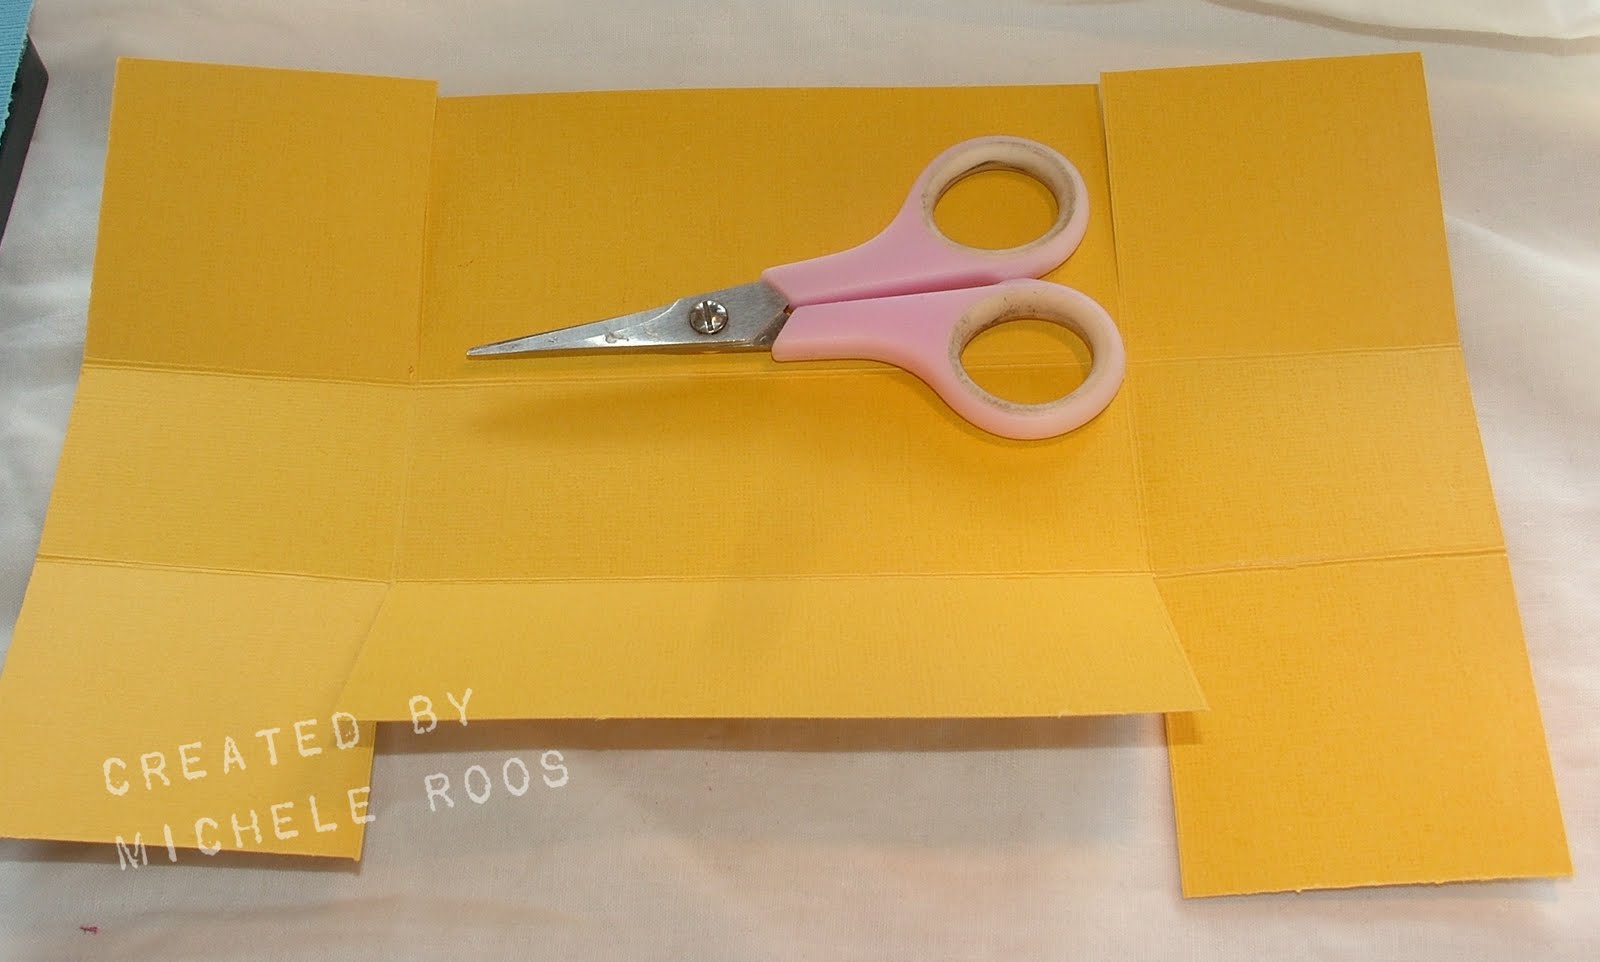
First, you will need a piece of cardstock that is 6 3/4" x 10 3/8" (this will be the bottom). and a piece that measures 7 3/8" x 11" (this will be the top)

Score the 6 3/4" x 10 3/8" piece at 2 1/2" on all four sides.

Score the 7 3/8" x 11" piece at 2 3/4" on all four sides.

Crease all score lines using a bone folder (on both the top and bottom pieces).

Make vertical cuts (following the score lines) to create "flaps" in each corner on both the bottom and top pieces of the cardstock


DSCF8300

**Optional** - I like to cut off part of the flaps (see picture above). I find that it makes for a nicer finished product, but this step is completely up to you.

DSCF8302

**Optional** - To pretty up the box a little bit I've used some of the gorgeous DP from the April Kit and then stuck it down using double sided tape.

DSCF8304

Using a strong doubled sided adhesive, assemble both the bottom and top pieces.

For the dividers, that go inside the box, I made mine 5 1/4" x 3 1/4". I also glued the circle tabs (see pictures below) so that they stick up above the top of the divider. This is important because I have created the top of the box longer...to accommodate those tabs. If you would put the tabs flush with the top of the dividers, the top of the box would be too long.

Here are some additional pictures of the box and the dividers I created...
DSCF8312

DSCF8316

DSCF8314

DSCF8315

All the material, apart from the divider tags, I've used to create this project is from the April Kit.

I hope that you've enjoyed this tutorial and has given you a little inspiration on what you can create using the gorgeous goodies from the April Kit from the Crafty Alley.

Hugs Michele xxx

Tuesday, April 13, 2010

Truly Scrumptious Tuesday

image

Hi there and thanks for stopping by today. Well it's my turn to do a little posting on here, so I thought that I'd show you two cards that I've made using the gorgeous goodies from the April DT Kit. Don't forget that you can purchase them from here but you'd better be quick, as there's only a few left

DSCF8167

This is the first card that I'd like to show you. The DP, corrugated/orange cardstock, yellow gingham ribbon, flowers and pearl-ended pins are all from the April Kit.

image

For the edges I've gone over them using Adirondack Acrylic Paint Dabber - Gold that I got from the Crafty Alley.

image

And here's a close up of the gorgeous flowers that was in the April kit along with the yellow gingham ribbon and pearl-ended pins.

DSCF8201

And here's the second card that I'd like to show you using another of the gorgeous DP from the Kit. I've also used the gorgeous lace ribbon that was in the Kit

image

Here's a close up of the gorgeous ribbon and the DP. I've inked up the edges using the chalks that was in the Kit. To achieve the look around the image, I first stamped using clear embossing ink and then gone over it with the chalks that was in the Kit.

Robyn has done a fantastic tutorial on how to achieve this look, it's just a couple of posts down, click HERE go there now.

Don't forget to pop back here tomorrow, as the lovely and talented Louise will have a technique video for you.

Enjoy the rest of your day

Hugs Michele xxxxx

Monday, April 5, 2010

Spring Flower Card

image

Hi there and thanks for stopping by. Today I'd like to show you a card that I've made using some of the gorgeous papers from the DT April Kit.

image

To achieve this look, I took some plain yellow paper and used my MME Bloom & Grow clear stamps and Tea Dye Distress inks all of which I got from the Crafty Alley.

image

For this card I've not even used half a sheet of the Cosmo Cricket Early Bird : Apron Strings as it's double-sided. So the scrap part I was able to re-use again turning it over. I've ran the papers through my sewing machine and then inked up the edges using Frayed Burlap Distress inks.

image

This gorgeous green lace ribbon also comes in the kit.

image

And here's a close-up of the gorgeous flowers and pearl-headed pins, that is also in the kit.

image

The image I've used has been coloured using ProMarkers and then I've inked up the edges using Frayed Burlap distress inks.

DSCF8160

And here's the end result.

Hugs Michele x

Patchwork Fun......


Hey everyone,

How was your Easter weekend? Well, I had a lot of fun as I got to play with April's kit from The Crafty Alley!!! It really is packed full of all you can need for a month of crafty fun!! My first project is ''off the page'' but can be adapted into a layout or a card. I started a family journal to write down things we said or did, when Finn walked etc....and altered the cover using the Kit. The kit includes Tim Holtz grungeboard squares and they are so versatile!! I had planned to share a layout this week but was inspired by Robyn's challenge and used some sewing in this project. I inked up the squares with 6 different coloured Tim Holtz distress inks and stitched them into a patchwork background.........


Then I used a tag from the Kit and distressed the edges......


There is a whole sheet of borders and how cute is this ruler one? I distressed the edges of that too and then pleated it. Some distressed stitching and buttons added the finishing touch.


I love the end result. The ink on the grungeboard gives a faux suede effect. And guess what? I haven't even dented the kit, I still have about 97% left!!! It's packed!!

Louise xx