Monday, May 10, 2010

Guest Designer Nicole Mullen's Hanging Shopping List


Is this not what every home needs? This beautiful hanging shopping list was designed and created by Nicole Mullen using May's Crafty Alley Kit. We love the use of the lace for framing and the papers Nicole has chosen. We will be looking forward to seeing a lot more from Nicole!

You can see more of Nicole's work over at http://nicoleqmullen.wordpress.com/. Why not stop by her blog and say hello!

Big thanks to Nicole for sharing her work and being our first guest designer!

Cathy x

P.s. Remember you too can be a guest designer - just send in a picture of something you have made with a Crafty Alley Kit by Friday evening and I will post it the following Monday!

Saturday, May 8, 2010

Fun in the Sun

image

Hi there everyone and thanks for stopping by. Today I'd like to show you a card that I've made using items from the gorgeous May Vintage Findings Kit.

DSCF8377

Everything listed below is what I've used on this card is from the May Vintage Findings Kit:-

  • DP Making Memories Vintage Findings - Green Floral Findings & Postcards Findings
  • Bulldog clip
  • Postage stamp
  • Green gems

If you would like to see what other gorgeous items are in this kit, please click here.

Enjoy the rest of your weekend

Hugs Michele x

Wednesday, May 5, 2010

Chez Marguerite...

Hi guys,

Well you all know how excited I was about the new kit that came out this week! Well, now I have it, and I LOVE it!!!!

So.. with no further rambling on my part, here is my first project using the May Vintage Findings kit.

I used the scallopped chipboard piece, covered it in one of the patterned papers and inked the edges. Embellishment wise, I used the Prima flower, lace, butterfly ribbon and gems from the kit, and the decorative panel is from the elements page, backed on to the plain Bazzil cardstock.

I used my Windsor and Newton bottled inks to add some colour to the centre of the Prima flower, and also to dye the butterfly crimson. I also stamped a flower image in Brushed Cordoroy Distress Ink and coloured the edges with the same crimson ink.


It looks tres cute on the back of my craft room door!!

Hugs,

Katie xx

May Kit Video


Tuesday, May 4, 2010

Prima Paintables


Hi Ladies,
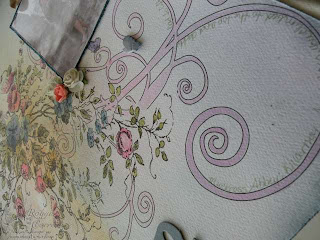
Included in the absolutely amazing Crafty Alley Kit for May is a lovely 12x12 Prima Paintable from the Iron Orchid Designs line. I just love working with these! They are so versatile and are made from watercolour paper, so works well with inks, paints, chalks, etc.

If you would like to see what else comes in the fabulous kit, you can click here for further information and ordering details.

Crafty Hugs,
Robyn xx


Sunday, May 2, 2010

Vintage Findings May Kit Now Online

Hi all, 

I am delighted to announce our latest kit which is based on Making Memories Vintage Findings Range.


In this kit you will get 

This month we bring you an amazing kit based on the Making Memories Vintage Findings Range. In this kit you will get 
  • 3 Bazzill Cardstock in 12x12
  • 1 Sheet of Vellum 12x12
  • 1 Prima Paintable 12x12
  • 8 Double Sided Vintage Findings Paper 12x12
  • 1 Polka Dot Ribbon
  • 2 Lace Ribbons
  • 1 Butterfly Ribbon
  • 1 Scalloped Chipboard Piece
  • 1 Card and Envelope
  • Darkroom Door Art De Fleur Thumbnail Images
  • A Magic Mesh Roll
  • A Distress Stickle
  • 2 pots of gems
  • Tim Holtz Swivel Clasps, Fragments, Hinge Clips
  • 1 Large and 2 Small Prima Flowers
  • Vintage Findings including Envelope, Labels, Tickets, Stamps, Flower Pin and Garment Pins
  • 2 Cut Piece of Fabric (Red and Ivory)
The value of this kit is well over €50 but we are selling it to you for just €30!
Don't forget to see what our design team are doing with this kit by visiting The Crafty Alley Design Team Blog

Cathy

Friday, April 30, 2010

Felt Tote for a Tiny Tin and Mini


Everything used to create this project is included in the April kit with the exception of the tin; which can be purchased separately from the Crafty Alley shop.


Wow, try saying that title 5 times fast! I have one final post using the incredibly sweet, fun, and whimsical April Crafty Alley kit. It will be sad to see it go, but the day is not over yet. If you would like to purchase this kit, and reserve a May kit for yourself by doing so you can click HERE for ordering information. The kit for May is WAY over the top! Cathy did a fabulous job putting it all together! I absolutely am in love with it!

Included in the April kit was an A4 piece of felt; which at first glance, I just thought about die cutting and adding it as a project element. But then I decided it would make an adorable little tote to hold the tin I made for my daughter with a little accordion mini inside. It went together very quick, and my daughter is really enjoying it. Hope you've enjoyed seeing all of the DT projects this month. I know that I have.

Here are a couple of photos of how the tote was cut. I didn't include the sewing or hot glueing part, but that is pretty self explanatory. All I did was use the large strip to attach the 2 top note shapes that I cut with my Big Shot, and the 2 smaller strips are the handles; which I hot glued on. The large strip is the bottom and sides of the tote and can be cut to suit the width you'd like.

I cut the 2 handles each at 1", and the strip for the bottom/sides of the tote at 2".
If you don't have a die cutter, you can also create a tote as shown just by folding it in half and attaching the handles, and eliminate the bottom section by cutting the larger strip to fit the width of the sides. I used a Sizzix Bigz die in a top note shape cut twice for my tote. Hope that makes sense.

Have a great weekend.

♥Robyn

Thursday, April 29, 2010

Material Girl Sewing Box

Hi there everyone and thanks for stopping by. Today I'd like to show you a project that I made using items from the April Kit (apart from the flowers and the cotton reels)

image

I have so many little reels of cotton that I decided to make this little box with four drawers that would hold them all in.

DSCF8348

For this drawer I used the scissor charm from the kit and glued it to the button which is also from the kit.

DSCF8342

DSCF8346

DSCF8345

For these drawers I've used the beads from the kit and I've attached them using buttons which are also included with wire and then glue.

I hope this has given you some ideas on how versatile this kit is.

Hugs Michele xxx

Tuesday, April 27, 2010

A Needle Case for the Material Girl ... + TUESDAY TUTORIAL

Hi Everyone,

Katie here, and this week it's my turn to show you a tutorial using this month's kit. This is the last week of this month's kit, and don't forget that the only way to guarantee your place for next month's kit is to buy the April kit!!

Last week I featured the Early Bird paper range, so this week I decided to feature the other paper range included in the kit: Material Girl by Cosmo Cricket.

I have made an open up case to store all my sewing needles and pins etc...

Here is the front cover..

And here is the inside... there are spaces to store pins, safety pins, and my measuring tape...

So.. Let's get started!!

Firstly, I cut two thick pieces of cardboard to make the front and back covers. I recycled the back of an old watercolour paper pad, as it is VERY thick and durable. I then covered both sides of each page with the Material Girl papers.

I then sanded the edges to give a smooth finish. (Look at the cool sanding tool my Daddy made me last time I visited home :-) )

I then used Distress Inks to ink up the edges (I used Brushed Cordoroy - my favourite go-to ink)

Next up, I cut out a sentiment panel from the borders page, and again inked the edges...
I then highlighted some detail on the panel using Glossy Accents, and finished adding the decorative elements to my front cover...

Now it's time to make the hinges. I used the Grungeboard rectangles included in this months kit, covered them in one of the papers and inked the edges, and then punched two holes in each hinge. (Nearly broke my hole punch.. note to self, buy a Crop-a-dile!!)

I then put one of the American Craft's brads included in the kit through each hole, to give a riveted effect.


I then glued the hinges onto the front and back covers, and tied some fibres around the front cover to add detail. I also added a half backed pearl from the kit to each hinge.

Now it's time to work on the inside...
I took a piece of the border page, inked the edges, and punched two holes and threaded through some ribbon...

I then glued the paper panel down and used the ribbon to tie around the tape measure and hold it in place...

For the other page, I used a Nestabilities die (available from the Crafty Alley), to die-cut a felt panel, and again punched two holes through it and threaded through this GORGEAUS daisy lace from the kit...

I tied the daisy lace around the back of the book, and I now have a felt panel to store all my needles and safety pins in...

Well, that's it!! I hope you enjoyed the tutorial ... my next post will be using the MAY kit.. and I am so excited!! Roll on next Tuesday!
Hugs,
Katie xxx

It's A Challenge.....

Hey everyone,

How are you all? My Monday post is a little late, I know, but I had some family things the past few days that delayed me!! So now it's just after midnight, (technically Tuesday) and I finally have a quiet moment to share with you!! This week is the last week of the April kit (Sob!!). It was such a fun kit to work with. I especially loved the papers as there was so much you could do with them. This week I made a tag and pocket entirely out of design paper.....


After the layout I made last week, I just had to cut up some more of the fab paper and challenge myself to use only that to embellish my tag......


There were so many border strips, quotes, images, patterns............


And of course I had to add some distressing.......


So my CHALLENGE to you is this...... create something, anything, using ONLY design paper. Be creative. Do not be afraid to cut that paper any which way you please!!!! You will have two weeks to link your work here and become a follower of the blog. We will the pick a winner and that lucky someone will win a fab prize sponsored by The Crafty Alley!

Have fun!!

Louise xx