Tuesday, June 15, 2010

Timi is back and wow......

Good morning all - I am delighted to show you the gorgeous creation of our guest designer Timi this week. 


The expandable photo box was inspired by Marion Smith at apieceofcraft.com. (Video tutorial in link)
For more details on how Timi made this project visit her post here. 

Timi said "I loved all the Crafty Alley Monthly Kits, but this is my favourite so far, because I really like Tim Holtz and his metal pieces and I was happy to get few pieces from many of his products. I couldn't wait to get my hands on the distressed papers they are just so versatile, and  all the things in the kit coordinate well with each other,  so you can do many projects of it."

Thank you so much Timi for being part of our team again this month and we are looking forward to seeing more of your creations!

Cathy

Monday, June 14, 2010

Introducing Sandra as our Guest Designer

Hi all,

Meet Sandra our guest designer this week. Sandra is new to our kit club and has made these amazing projects after only having the kit for about a week. Sandra is also an active new member of our Ning Network and we are delighted to have her on board!


Check out these gorgeous altered items including tags, purses and a stunning card.


Thanks so much for sharing Sandra and we hope we will be seeing a lot more of your projects here on the design team!

Cathy

Friday, June 11, 2010

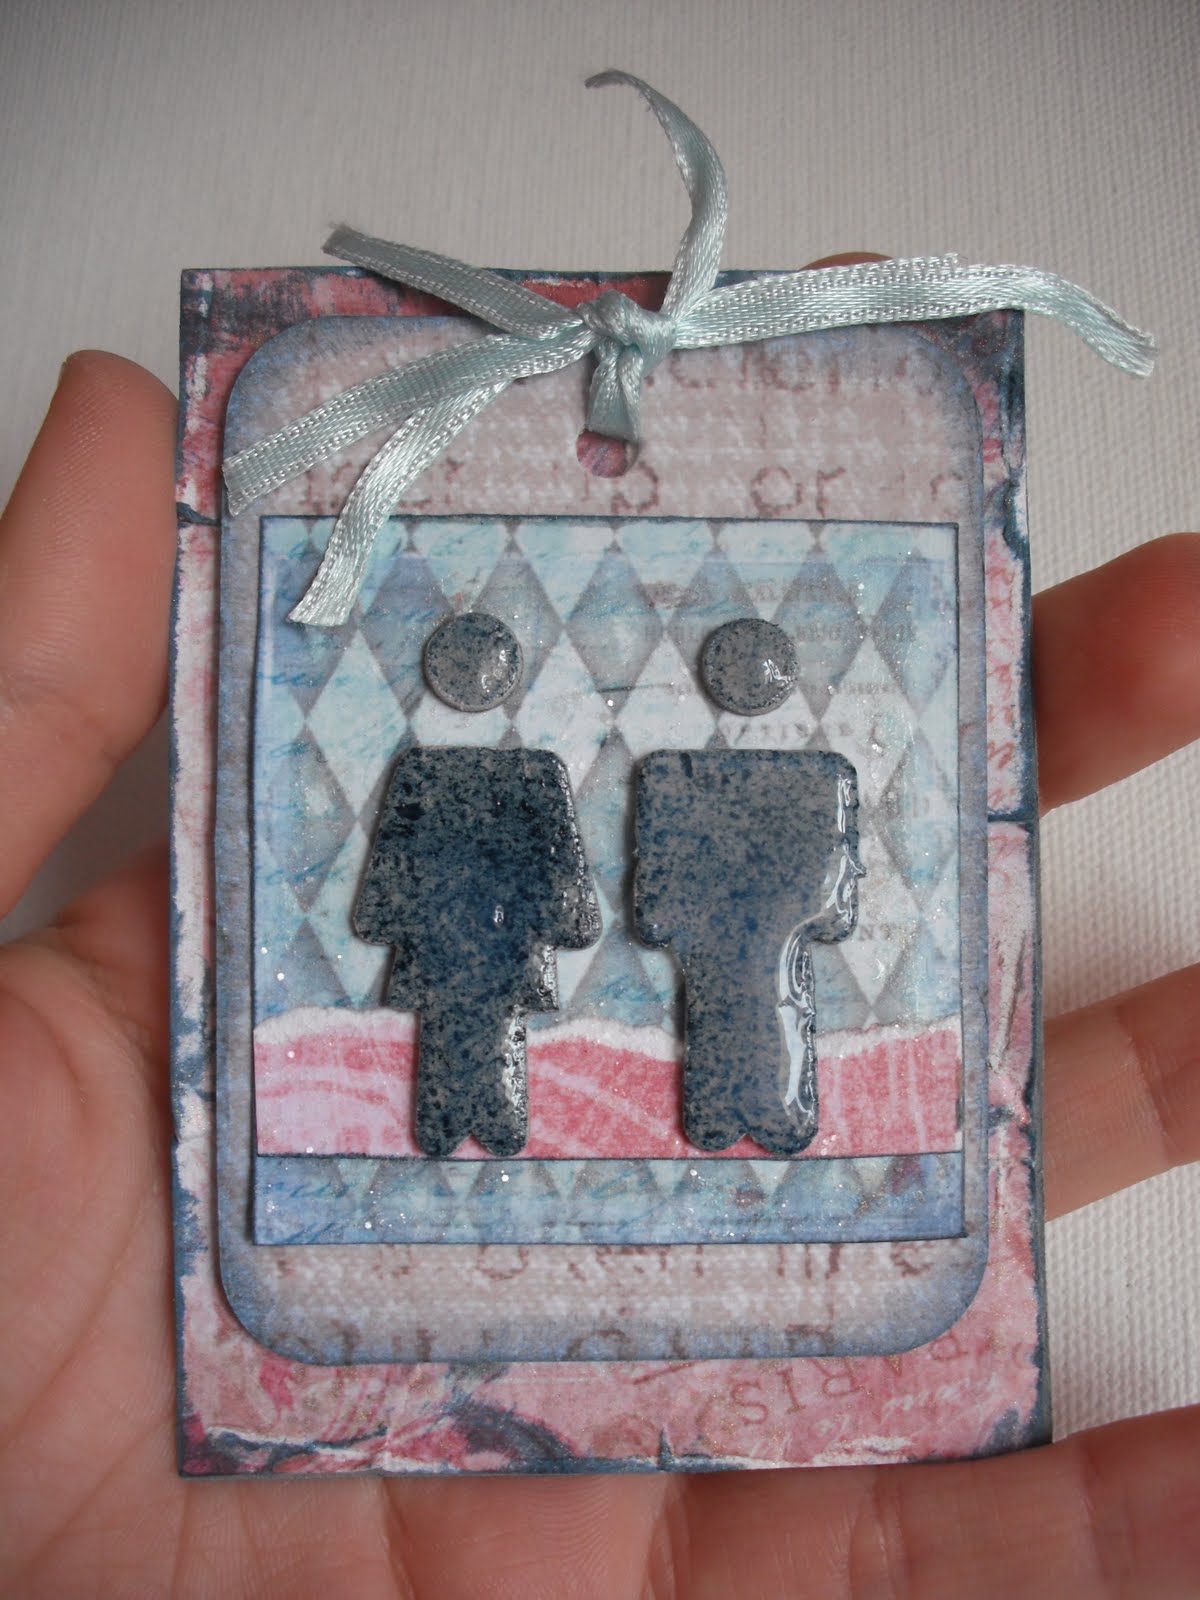
It's ATC time!

Morning everyone,


Well, my week is now drawing to a close, so here is my final project using this month's kit: an ATC using the ATC-sized paper designs as a base.

I took the ATC sized piece from the kit, sanded the edges, scrunched it up, and then used the ink pad directly to the paper to ink it up. I then sprayed the whole piece with a mixture of water and Heirloom Gold Perfect Pearls, to give a glimmery effect. Unfortunately the photo doesn't really show it too well!


I then layered up my design, embellishing it with some of the Grungeboard Iconics and Rock Candy Distress Stickles. To get the speckled effect, I took the piece of grungeboard, laid it onto the ink pad face down, and pressed firmly. I then finished it off with some Glossy Accents.

Well, that's it from me! Next week is Guest Designer week, so please email Cathy your creations as soon as possible!! After that we will be seeing some projects from Robyn.

Hugs,

Katie xoxo

Funky Summer Journal

Hi guys,

I have a journal to share with you today. I had lots of fun making it, and my desk is now covered in acrylic paint and sandpaper !

To alter the top note chipboard piece that came in the kit, I first embossed it using an embossing folder, then painted it with white acrylic paint. When that was dry, I sanded it to reveal the design, and then covered it in Stormy Sky Distress Ink. I then roughly painted around the edges again with more acrylic paint. I got the idea for this technique from the new book by Tim Holtz, 'A Compendium of Curiousities', which is available to buy HERE.

I altered the heart die cuts by first painting them all with white acrylic paint. For the crown I then simply added some Diamond Stickles. For the heart, I covered it in Rock Candy Distress Stickles, and then outlined it with silver Stickles. Finally, for the wings, I gave it a good layer of Distress Crackle Paint in Rock Candy, and when it had dried, I then splodged on more acrylic paint to heighten the texture, and give a distressed, feathery look.

I bound my book with book rings and added ribbons and string from the kit.

For the inside, I made three folders out of patterned paper, and stamped and embossed an image on to the front of each folder.
I also stamped each journalling page to add detail.

Well, that's it for today! I will be back again tomorrow with another project to share with you.

Hugs

Katie

Items from kit used:

Design Paper

Ribbons and Silver String

Distress Ink in Stormy Sky

Metal Corners

Top Note Chipboard Piece

Heart Die-Cut Chipboard pieces

Mini fasteners

Thursday, June 10, 2010

I heart my Mini Album :o)

Hellooo!!

I had SO much fun with the kit this month. I love it! No surprise really that it sold out in about three days!

This is the mini that I have made:

And now for the inside... lots of details and photos coming up :)

Pages One & Two

For the inside cover, I tried to make a sky effect by first painting the chipboard with white acrylic paint, and then splodging over the Distress Ink. I then just added a photo mat, some flowers and Liquid Pearls (you all know how much I love them).

The right hand page is a simple page, with a punched border holding in a selection of photo mats and tags.

Pages Three and Four

On the left hand side, I used my Nesties to make a circular photo mat, which I them simply embellished with a hand made flower, and a tag tucked behind the photo mat.

The right hand side is another pocket page.

Pages Five, Six and Seven

I loved the paper on the left hand page so much that I didn't want to cover it much, so I simply painted the chipboard flourish from the kit with white acrylic paint, added some Distress Stickles, and made a flower with the Tim Holtz Tattered Florals die, and the flourish holds the tags in place.

I also made an acetate page, where I just used my Crop a Dile Big Bite to set some flowers with eyelets, and then inked the edges with Black Stazon.

On the right hand page, I added some of the Magic Mesh from the May Kit, then used one of the ATC sized designs from this month's kit as a photo mat, which also hides more tags and tickets behind. I decorated this flourish with white acrylic paint and Petal Pink Liquid Pearls.

Pages Eight and Nine

Two simple pages - swivel out photo mats on the left hand side, and simply flowers and Liquid Pearls to make a framed page on the right hand side.

Pages Ten and Eleven

On the left hand side, I simply made a top note with design paper, tied around some of the lace from the kit and added a trinket pin (thanks Club Member Sandie for the idea on using the trinket pin!). I made the top note into a pocket to hold another photo mat, and added one of the Snippets at the top for a title.

On the right hand side, I used up my scraps to decorate one of the envelopes from the kit, which holds tags both inside and behind.


Back Cover

Finally, I simply added a locket that I die cut from artists mount board on the back.

I hope you guys like it and that I haven't bored you all with such a long post!!

Hugs


Katie xoxo


Items from kit used:

Design Paper

Grey A4 Paper

Lace and Ribbons

Tim Holtz Key Hole

Tim Holtz Ball Chain

Distress Ink in Stormy Sky

Tim Holtz Foliage

Tim Holtz Mini Fasteners

Grungeboard Iconics

Chipboard Flourishes

Tim Holtz Journalling Tickets

Tim Holtz Trinket pins

Envelopes


Ribbons, flowers, and butterfly embellisments from stash.

Tutorial Wednesdays: How To Make a Frame Brag Book!

Hello!

As promised, here is the tutorial for the Brag Book I showed you yesterday.


For this tutorial, you will need:

  • Glue Stick

  • A frame die and die-cutting machine

  • Your June kit

  • Artists mount board or chipboard, available HERE

  • Hole punch, eyelet setter and 6 eyelets

Firstly, cut six pieces of chipboard, big enough to die cut a frame out of, and cover them in your favourite patterned paper.

Now, die cut 6 frames.

I have chosen a curly frame for this project. Once cut, your frame will look like this:

The six frames will go back-to-back to make three frame pages.

Now, cut six pieces of acetate for the frame windows. I am using the acetate from Sizzix die packaging, but then again I am slightly obsessed with recycling! Waste not, want not :-)

Glue the acetate onto the back of each of your six frames. I find Glossy Accents works well for this step.

You should now have six frames like this:

Next, punch each frame in the corner, and set an eyelet into each frame to make the book hard wearing.

Then, add foam squares on the bottom and two sides, and sandwich your frames together.

You should now have something that looks like this, and you can slip in your photographs from the top. I have slipped in some of the ATC sized designs from the kit, they look so cute!

You can now bind the book, either with a book ring or with ribbon, and embellish it as you like!


I hope this tutorial was helpful!

Hugs,

Katie xoxo

Wednesday, June 9, 2010

Grandma's Little Brag Book

Good Morning!!

Katie here, and I will be sharing some projects with you this week.

I have a little brag book to show you today. It has three double sided frames, perfect for popping in your handbag and showing off pictures of the kids at every opportunity!


I will post a tutorial tomorrow on how to make this project!
Also, next week will be Guest Designer Week! I have had a little peek over on the Crafty Alley Ning Network, and I know for a fact that there is some AMAZING work being done with this month's kit. So, please email photos of your work to cathy@craftyalley.com , for a chance to be a Guest Designer.
Hugs

Katie xoxo

Items from kit used:
Design Paper
Lace
Silver String
Tim Holtz Muse Token

Friday, June 4, 2010

Super Dad

Hi and thanks for stopping by. Today I'd like to show you a card that I've made using the gorgeous DP from the June Kit.

DSCF8821

Materials used:-

DP: June Kit

Tim Holtz Journal Ticket: June Kit

Enjoy Sentiment: May Kit

Large Red Brads: April Kit

Everything else is from my stash.

Ok that's it for me and I hope you enjoy you're weekend.

Hugs Michele x

Thursday, June 3, 2010

Summer Fun Card

Hi there and thanks for stopping by. Today I'd like to show you a card using the gorgeous papers and embellishments from the June kit.


DSCF8809

All the items used on this card are from the June Kit, apart from the image, star shape and poppers.

image

Here's a close-up of the metal corners that is in the June kit.

image

And here's a close-up of one of the metal sentiments that is in the kit.

DSCF8826

Here's another close-up of the metal Tim Holtz Idea-Ology embellishments that comes in the June Kit.

Hope you enjoy the rest of your day.

Hugs Michele x

Wednesday, June 2, 2010

Tutorial Wednesday - Handmade Paper Flowers with Stamen Centres

dscf7781

Hi there and thanks for stopping by. Today I've a tutorial to show you on how to make the above flowers along with the handmade stamen centres.

clip_image002

Here is a list of supplies to make the above flowers:-

4 x 5 petal flower shapes

Piece of string

Crushed Velvet Flocking (or anything similar)

Embossing Tool

Clothes peg

Marker pen

Piercing tool

Scissors

Tweezers

PVA glue

clip_image005

On each flower, cut down the petals to open them up more. In the picture I've tried to show you roughly where to cut.

clip_image007

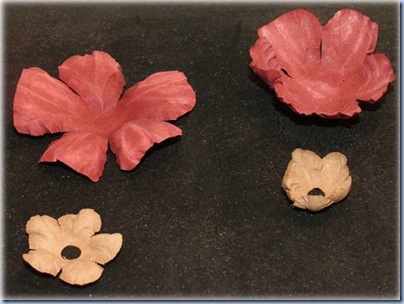
Turn the flowers onto the wrong side. On each petal, emboss just the outside petals in small circular motions. Then with the embossing tool again, gently go down each petal to create a line.
clip_image009

Now turn the flowers onto the right sides and emboss the centre of each flower until they resemble the flowers on the left hand side.
clip_image011

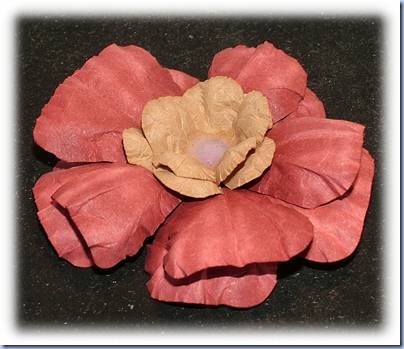
In the centre of each flower, pop a small blob of pva glue and start layering them up. On the last flower also pop a small amount of glue. At this point get your piercing tool to make a hole all the way through. Make sure it's quite a large hole as the string has to go though this.

clip_image013

Now get your piece of string and this is where the marker pen comes in. Colour the string whatever colour you want just by dabbing the pen onto the string. This way it won't ruin the nib of your pen. Wait a few minutes for the ink to dry and then start twisting the string until it starts to unravel. Separate the string until it resembles the above picture.

clip_image015

Now attach the string to the clothes peg and carefully dip the ends into some glue. Make sure you get a nice bit on the ends.

clip_image017

Next step is to sprinkle the flocking, glitter, flower soft etc.... onto each section. Make sure that it is fully coated. Then carefully feed the string through the top hole of the flower all the way through to the last flower layer. I find this is where the clothes peg comes in handy again as this will keep the string in place as it dries.
clip_image019

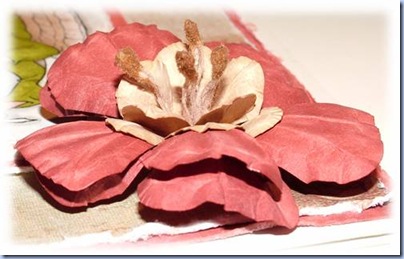
And here's a close up of what the flower will look like

I hope that this tutorial has given you some ideas on how to make paper flowers.

Hugs Michele x